Showing posts with label supplies. Show all posts

December 30, 2011

1911 - brown paper packages tied up with string


The schedule is posted above the machine, materials are organized, and I'm looking forward to starting the sew along next week! I'm also happy because when I returned home after being away for week I found two packages waiting for me. The corsetry supplies I ordered from both King & Co. Corsetry, and Sew Curvy Corsetry arrived! As a reminder, the discounts offered to sew along participants expire January 15th, so do visit Caitlin and Julia's shops if you haven't gathered all you supplies and take advantage of the special offers while there is still time! Find all the information and promo codes here.


How has the pattern enlarging been going? There have been other ways to enlarge the pattern posted in the comment section so everyone should be able to find a technique that works if mine isn't your cup of tea. Thanks for all the suggestions, it's that commentary that will help the sew along be a success!

December 15, 2011

1911 corset sew along - supply list and some wonderful offers


There are two special offers on for sew along participants. Caitlin at King & Co. Corsetry, based in New York City, will give participants 10% off everything in the store, English coutil, grommets, busks, and patterns for future corsets. This off expires January 15, 2012 at 11:59 PM EST. Use promo code SEW1911 at check out.


And Julia at Sew Curvy Corsetry, near Oxford UK, will give participants a 10% discount on corset supplies. She has a wide selection of coutils, busks and metal findings. This offer also expires January 15th, 2012, but at 11:59 PM GMT. Use the code bridges at check out.


I'm going to take advantage of both offers. There are black grommets at King & Co. that I would love to finish a corset with, and Sew Curvy has satin coutil, which I have been wanting to use. A big thank you Caitlin and Julia for supporting the 1911 sew along!

Here is a list of supplies needed to make a corset that fits approximately size US 6-8, a UK 10, or a European 38. If you are a few sizes larger, or smaller, you will need to adjust quantities accordingly.

pattern - either Corsets and Crinolines 1911 corset, or the post edwardian pattern I drafted for Foundations Revealed
1 yard fabric - I'll love coutil, but if you want to sew with another fabric I'll be posting about fabric choice soon. (If using 54 inch wide fabric only 1/2 yard is needed)
1- 9 or 10 inch busk
12 - 9 inch ¼ inch wide flat steel bones
8 - 16 ½ long inch ¼ inch wide flat steel bones
2 -10 inch long ½ inch wide flat steel bones
1 yard – lace or broderie anglaise (optional)
1 yard twill tape for waist stay
10 yards - 2 inch wide bias to trim top & bottom edges, bone casings & garter covering
5 yards - 3/4 inch wide bone casing
1½ yard - elastic for garters
6 garter slides and grips
42 - size double zero grommets
7 yards - double face satin ribbon or cord for lacing
1 - spool thread

Tomorrow I'll post a list of answers to some of the frequently asked questions I've been receiving. Until then, we can gaze at the lovely Diana in the C.B. Corset ad from Dessous Elégants published in March, 1912.

November 18, 2010

a new use for napkins


Oh my goodness. Has it really been a month since I last posted? Time for more sewing and less sleeping.

I dug through my storage bins to see what suitable fabric I had for the 1844 corset and found a roll of uncut linen napkins that will be perfect. Here is a lovely out of focus image that captures some of the design and the checkerboard cutting line.


And here a close up of the selvedge side of the roll in its piled-in-the-box, un-ironed shape.


I found this fabric at a thrift store a couple years ago on a 50% off all linens table. The safety pinned on tag read, table runner $2. I laid down my dollar and waltzed away with 6 uncut, crisp and clean, damask napkins that I knew would eventually become a corset. At 22 inches wide and 124 inches long there should be enough to get the job done.

Yea! Back to corset work.

June 27, 2010

baleen


While the hand is healing I thought I'd share something I found.


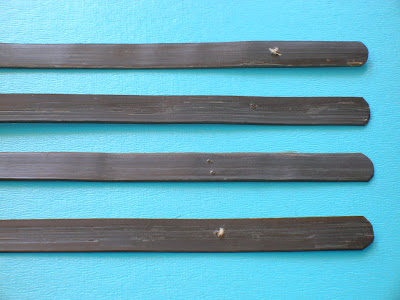
Bone casings salvaged from an old victorian bodice. And what was the boning hiding inside?


Unless I'm mistaken, that's whalebone. I am not going to store this in a drawer of sacred things. There are 13 pieces measuring between 9 and 5 inches, enough to provide support for a ribbon corset, so I plan on using this. To the whales I say, thank you. I know the way we used you was horrible, but it seems like it would be equally bad to not use and appreciate this baleen now.

I've never seen genuine baleen before, if anyone out there has please let me know if I'm correct in thinking that is what I have. And if you've been fortunate enough to work with old whalebone is there anything I need to know ?

May 27, 2010

look what just arrived!


Twenty five meters of 13mm German plastic boning!


I ordered it from Vogue Fabrics at 10 pm Monday, and here it is Wednesday afternoon. Wow. I'll probably use cane for the mock-up because it's cheaper, but it will be good to have the best possible whalebone substitute I can find for the finished piece. Silly whales. Why did you have to be so useful for fashions and cosmetics so we hunted you to near extinction?

April 16, 2010

better garters


One and a half inch wide waistband elastic works well. It fits the hardware much better than the elastic that was used for the shoulder straps.


It looks a bit masculine here, but I'm confident it will look good on the corselet. I should be finished with this project this weekend!

April 12, 2010

elastic issues


Why is nothing as easy as it appears it should be? Weeks ago, after attaching the shoulder straps I asked for opinions about covering the garters with brocade, or leaving them plain elastic. After reading your comments (thank you for your input) I decided to go with the plain elastic. The contrast against the brocade should look nice, and it suits the time period of the corselet too. But look at this.


One inch wide elastic and 1 5/8 inch wide clips and grips. I've gone to the three closest sewing supply stores and have not found elastic the right width. Argh! If I can't find the right width in the fashion district I'm going to have to cover them. Not the end of the world, but keep your fingers crossed that I find what I'm looking for.

February 27, 2010

corselet boning test


It would be horrible to finish this corselet then wish I'd used a different type of boning. Horrible. So I did a test. The top casing would hold plastic, the middle spiral steel, and the bottom flat steel. 


The original pattern showed the bones to be only 4 inches across. I had a piece of 5 inch flat steel that was already cut and finished at both ends so I made all test pieces 5 inches. After they were slipped in place I tried the corselet on.


Spirals right? I hate the way the ends of the flat steel poke outward. That's not pretty. I'm thinking of adding one more row of boning at the bottom. I may wait until the garters are attached to see how the fit is when anchored down though. 

Look at that straight 1920's silhouette!

February 24, 2010

corselet casings


The boning across the belly will be contained in pre-made bone casing tape. The tape is available by the yard in different widths and in black or white. I'm using 1/2 inch wide black tape.


I basted each casing in place, folding the open end under at one end, but leaving the other open so I can slide the boning in. Then I laid artist's tape across the front as a guide for stitching. Even though I used low tack tape I did not want the adhesive pulling the brocade so I stuck it to my jeans a few times before putting on the corselet. 


Since the basting was at the top of the casing I sewed the across the bottom of the casing first. I don't know if It would have made a difference either had I sewed across the top first. Probably not. After the first line of stitching was done I sewed the second right on the basting stitches.


The first casing from the front.


And from the back.


Now the question, flat or spiral boning?

February 5, 2010

and the shuriken goes to...


Abby! Congratulations! Abby, if you email me your mailing address, the link is on the left, I'll ship the tailor's shuriken off to you. Happy measuring!

Thanks to everyone who entered! When I thought of the giveaway, lurking in the back of my mind was, "What if only three people enter?" So thank you so much for taking the time to stop by. Your comments are so appreciated!

And here is shuriken information for everyone else who would like one. It turns out, sadly, there is a real name, it's called a UMD Measuring Disc. Boring. If the bin I pulled it from had been so labeled I never would have come up with a much more fun name, so I'm glad it wasn't. 

Alright then, back to work. I have hooks & eyes to show you. They'll be up next. Soon to be followed by boning across the stomach.

November 9, 2009

detour


I'm going to be on the road for a couple of weeks, so I thought I'd pack a small project to work on without a sewing machine. 


That Ziplock bag contains a ribbon corset-to-be. I'm using the pattern for the 1904 light corset for sport or negligé wear, but this time I'm making it out of ribbon. The side, busk, and lacing, panels will be backed with cotton batiste, but there will be no coutil, or other heavier fabric on this one. Here's a close up of the 1 1/2 inch wide, cotton, petersham ribbon.


I could have chosen just about any color, but I went with the same fuchsia as the 1904 corset so a direct comparison between the two can be made. The plan is to hand sew as much as I can so when I return home I'll be ready to insert the busk and set the grommets. Wish me luck.

November 4, 2009

corselet fabric and garter grips


I broke down and bought fabric. 


It's a silk and rayon blend brocade. I love the chocolate and black colors, and the pheasant motif is most pleasing. The smooth brocade feels right for the corselet, since I want a slick fabric so a light, 20's flapper's dress will glide over it. I could probably use this fabric on it's own, it's feels heavy enough to do the job of a thin cotton broché, but I think I should back it with a lightweight batiste. Not for strength so much as for cleanliness. It seems wise to have a layer of cotton against the skin instead of the brocade. I don't think I'll fuse them together, just flatline. 

I also have the garter clips and grips.


I ordered these from Lara Corsets ebay shop. Yea, 1 5/8 inch garter grips.

I still have to do one more fitting with the mock-up to fit the gores, but then I can cut into my pretty new fabric!

August 6, 2009

boning and more channels


The channels I've patterned (and sewn) are barely 1/4 inch wide. In theory 3/16 inch plastic boning should fit, but I didn't have any handy. I did however have miles of 2.25 mm basket reed left over from another project. I swear not all the corsets will be boned with cane and reed, but since I haven't bought a single thing yet to make this one I thought I just keep sewing instead of driving to LA to buy supplies. Plus, two reeds measure 5/32 inch wide so they'll fit perfectly. Basket reed it is.


I measured and cut the reeds for the small in between channels and sanded the ends.


After they were slipped in place I could work on the long diagonal channels. Because they have a slight curve to them I made another template and taped it in place.


I couldn't slide boning into these channels when after they were sewn because the ends of the channels are against other seams. So I sewed that first seam, placed two trimmed reeds between the layers next to the seam, held them snug in place, and using a piping foot sewed right up against them. 


The most difficult channels are finished. Once I sew the channels on the other pieces I can start assembling!

July 30, 2009

stays cut


Seam allowance was added when the patterned was traced onto the fabric. 3/8 inch looks so small when I'm used to seeing 1/2. There is no seam allowance on the bottom or sides of the tabs, the neckline and underarm, or the shoulder straps.


The Toile is not flimsy, but it's not the tightest weave so I thought I should beck it with something to help stabilize it and also prevent any show through of the denim. This is the cotton voile (Or is it batiste, what is the difference? And this also came from the fabric stash.) that I affixed to the back using Sullivan's Quilt Basting Spray


I don't expect it to completely "eliminate tedious hand basting and pinning" as the label claims, but I do think it will help hold the thin, floaty voile in place while I baste.

July 28, 2009

the rest of the supplies


The boning for the stays will be sandwiched between two layers of fabric, the exterior Toile layer, and an interior denim layer. The edges will be bound with navy bias binding.


The denim was purchased for a quilting project because it was lightweight and the perfect indigo. When I had difficulty getting a needle through I took a better look at the fabric and saw it had a super tight, super small, herringbone weave. I thought, hmm, this might work well for a corset.


I already have thread to match both the off-white of the Toile and the blue of the denim so off we go.

July 6, 2009

1880's done


Yea! 


And with the laces.


I'm hoping once on the body some of those wrinkles will disappear. Keep your fingers crossed. In the meantime, here are the stats.

approximately 1 square yard cotton adia cloth
3/4 yard - cotton coutil
6 yards - 1cm double faced satin ribbon
1/3 yard - 6mm double faced satin ribbon
2/3 yard - 3/4" petersham ribbon
3 yards - cotton string
1 1/2 skeins - cotton embroidery floss
3 - spools thread
1 - 12" spoon busk
34 - double zero grommets
2 - eyelets
8 yards - 8mm chair cane
54 inches - 6mm flat steel boning

number of seams picked out - 52


April 30, 2009

cane boning


Inspired by The Symington Collection's summer corset boned with cane I've decided to try cane instead of steel. If not now, when? So I visited the Cane & Basket Supply Company in Los Angeles. The man who helped me, Everardo, asked my what my project was and when I said a corset he didn't bat an eye. He just said, "describe what you need." Nice. He showed me the different types of cane and answered all my questions and five minutes later I waltzed out with 8mm binder cane. I went with the cane made from the outside of the rattan, rather than the cane made from the core, because it is stronger. So says Everardo.

April 17, 2009

supply run


When one needs a spoon busk where does one go? Farthingales! Farthingales is nothing but fun. Look at this wall of supplies.


And there are patterns, and tons of corsets for sale, and interesting things like this.


Not to mention the beautiful fabrics.


You know the feeling when you've got an idea, and because you haven't started yet you haven't made any mistakes, so you're just filled with enthusiasm, and you walk into the place that is going to provide you with supplies to make your great idea happen so all is right with the world? Farthingales.

Anyway, I picked up a spoon busk, tips for spiral boning, bone casing, and some spring steel. Once I cut down that busk I realized I don't have to purchase the boning pre-cut. I can cut it to whatever length I want. I have the power.


O.K. Time to get back to work.

April 1, 2009

1904 done


Here it is.


And from the back.


These pictures are not the greatest, taken in a mirror, but I couldn't wait to have someone else at the shutter. All in all, not bad. There are several things I'd do differently if I were to build this corset again. I can not stand the stitching across the top and bottom of the busk and lacing strips. I'd sew them by hand to give a nicer finish. I'd use metal boning by the laces and use a smaller size grommet. These look just a little large in proportion to the rest of the garment. But I'm happy with the fit and with the changes I made from the mock-up. I would sew this pattern again. I'd love to try it with real ribbons or with by fusing satin to batiste to see how it works when lighter. Even though there are not a lot of bones in this corset the coutil makes it very solid. If one were to wear a corset while playing tennis or bicycling I believe this would be the style to wear. In fact, I'll take it for a spin on my bicycle and report how it functions.

Here are the statistics.
3 yards - 4" double face satin ribbon
4 yards - 3/8" double face satin ribbon
1 - 8" busk
2 - spools thread
coutil scraps
16 - double zero grommets
not even 2 yards (58") 7mm plastic boning

number of seams picked out - 10

March 26, 2009

busk fun


Before I insert the busk I need to make sure it's the right length. Since the finished length of the center front will be 9 inches I need to use an 8 inch busk. I could drive to Farthingales and buy one, or I could trim down the 9 inch one I used for the mock-up. An 8 inch busk is $1 cheaper than a 9 inch one, but I will spend $4 for gas. I'm for saving the $4 and learning something new. 

I cut the busk out of the mock-up and marked a half inch off each end.


Then I broke out the Wiss tin snips. Yea.


I trimmed off the ends and clipped the corners,


then smoothed the edges with a file.


As if using the tin snips wasn't already fun enough, I got to use Plasti Dip too. I've had this container of Plasti Dip sitting around, unopened, for years. It worked just like it's supposed to. I dipped the ends in a couple times.


And they look perfect. 


I feel super resourceful.