Showing posts with label 1925. Show all posts

December 7, 2011

christmas, a couple weeks early


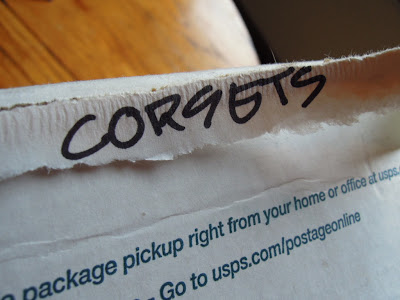
A package arrived today.


When I opened it I found this.


The 1650 bodice! And wrapped in packing paper was this.


The 1925 corselet! There was a reason I couldn't find these, they were still in California! I had planned to take them with me when I drove to my new home across the country, but space was tight in my tiny car and I left a few boxes behind. A shout out to Lisa, the best friend anyone could have, who found this box and sent it my way. Thanks Lisa! I miss you!

The grommets are set in the 1844 corset, it's ready for gore fitting this weekend.


Then I'll tie up the loose ends of the corselet and it can move to the completed pile. That means I should have two finished corsets by the end of the year!

April 23, 2011

1925 corselet pattern unearthed


Look what I found.


The altered pattern for the 1925 corselet! Normally I put the pattern pieces for each corset in their own giant envelope and neatly print out a label with a label maker. Why was this one crumpled and sun faded and not in an envelope? I'm hoping this means I'll come across the corselet soon.

May 6, 2010

what's the hold up?


I know. It's taking me forever to show the finished corselet. The loose ends have been tied, but I refuse to put it on until I buy a pair of stockings to wear with it. Otherwise I know it will ride up over my hips and look sloppy. So stockings are the hold up.

In the meantime, here is a picture of my most recent embroidery project.


This was what I worked on during my recent travels. I've had problems in the past with the satin stitch and the chain stitch. The way to solve that was to do satin and chain stitching. No need to avoid them any more.

April 26, 2010

stagnated corselet


The corselet has been hanging in the same spot, and is in the same condition, as it was five days ago.


I wish had an exciting reason as to why. Working on other projects just doesn't sound like a decent excuse. Because it's really not. But now that the other projects have been cleared I'll be dedicating myself to tying up all the those loose threads.  

April 21, 2010

garters attached


Still not finished! The garters have been sewn on, but there is a lot of hand finishing to do. 


The garters were attached the same way the shoulder straps were. But because of the elastic gores, and the bulk of the seams one each side of them, it was not possible to just sew the bias binding on with just the machine. Here is a close up of the trim near the bottom edge by the gore.


If I want the tucked under ends to look nice I have to sew them by hand. I also still have to backstitch the elastic to the corselet. And I added a couple extra garters too. The pattern calls for four, but I'm using six. I'm heeding the advice given by Mary Brooks Picken in Corsets and Close Fitting Patterns for corsets for full-hip figures. "The person possessing a full-hip figure should have several elastics attached to her corset so as to fasten it down, the elastics should be secured to the hose so as to avoid any break at the bottom of the corset." Not only will several elastics prevent a break at the bottom of the corset, they will keep it from riding up over those full hips. I have a feeling with this corselet I need all the help anchoring that bottom edge down that I can get.

April 17, 2010

garters assembled


The garters are ready to be attached to the corselet. The hardware was easy to assemble. First I sewed the elastic to the clawed clip.


Then I slipped the garter grip on the elastic and wove the elastic through the claw part.


Above you can see each step. From left to right, the elastic alone, the elastic sewn to the clip, the grip slipped onto the elastic, the elastic pulled up and through the clip, and finally, the clip closed.

Now all I have to do is attach them to the corselet, and finish with bias trim. After 5 months (How did that happen?) the end is in sight!

April 16, 2010

better garters


One and a half inch wide waistband elastic works well. It fits the hardware much better than the elastic that was used for the shoulder straps.


It looks a bit masculine here, but I'm confident it will look good on the corselet. I should be finished with this project this weekend!

April 12, 2010

elastic issues


Why is nothing as easy as it appears it should be? Weeks ago, after attaching the shoulder straps I asked for opinions about covering the garters with brocade, or leaving them plain elastic. After reading your comments (thank you for your input) I decided to go with the plain elastic. The contrast against the brocade should look nice, and it suits the time period of the corselet too. But look at this.


One inch wide elastic and 1 5/8 inch wide clips and grips. I've gone to the three closest sewing supply stores and have not found elastic the right width. Argh! If I can't find the right width in the fashion district I'm going to have to cover them. Not the end of the world, but keep your fingers crossed that I find what I'm looking for.

March 24, 2010

attaching shoulder straps and finishing top edge


It took a bit of time to figure out the steps for attaching the shoulder straps and finishing the top edge, but I swear it's not as confusing as it sounds.

I marked the placement of the shoulder straps with twill tape when I did the fitting to test the different boning materials. Then I started by folding over the top edge of the corselet 1/2 inch. Once I had the straps made I pinned them in place. (To keep all theses steps as clear as possible I'll show only the back staps, but the process was exactly the same for the front.)


I flipped the loose end up and trimmed it level with the top edge of the corselet.


I unpinned the strap and tucked it underneath the folded top edge.


The straps were then basted in place. I sewed the folded edge along the top 1/8 inch from the fold and trimmed the excess.


I made a 2 inch wide bias strip and pinned it the front of the corselet along the top edge, face-to-face.


The bias was sewn to the corselet 3/8 inch from the top edge. After pressing the trim, I folding the it over and pinned it in place. I stitched once again from the right side 1/8 inch from where I had just sewn.


The straps were hanging down, or toward the bottom of the corselet, during all of this. Now I flipped the strap up into it's proper position and back stitched to secure it to the top of the corselet.


A view from the right side.


And a view from the front of the corsetlet.


Yea. Not so complicated, just fiddly. The last thing left to do is the garters. Opinions please, should I cover the elastic with the brocade, or just leave them plain black elastic?
March 18, 2010

elasticized shoulder strap


Figuring out how to construct the shoulder straps was more difficult than I expected. I wanted a way to keep them snug against the body yet also allow some flexibility for movement. A simple tube of fabric pressed flat may have worked, but a should strap like that would almost certainly cut into the shoulders or be too loose.  I did not want to have them tie like the 1780 stays, that just didn't seem right, and I also didn't want them to be just plain elastic. We'll know how well my solution works when the corset is finished.

I started by making a 1 inch wide tube of brocade, the same width as the elastic I am using. You can see the elastic will just fit inside.


After the seam allowance was pressed open and trimmed I turned the tube right side out and pressed it flat, so the seam allowance now ran down the center. I sewed the end of the elastic to a piece of twill tape, then pulled the twill tape through the tube of brocade.


I pulled the tape until the elastic was inside the tube under the folded under edge. Then I stitched the across the folded opening sewing the elastic and the brocade together. After flipping the strap-to-be over I stitched the length from the front side 1/16 from each side, securing the twill tape inside to the brocade.


I'll attach the elastic end of the strap to the back of the corselet so there will be two inches of elastic exposed and hopefully the strap will function as planned. 

February 27, 2010

corselet boning test


It would be horrible to finish this corselet then wish I'd used a different type of boning. Horrible. So I did a test. The top casing would hold plastic, the middle spiral steel, and the bottom flat steel. 


The original pattern showed the bones to be only 4 inches across. I had a piece of 5 inch flat steel that was already cut and finished at both ends so I made all test pieces 5 inches. After they were slipped in place I tried the corselet on.


Spirals right? I hate the way the ends of the flat steel poke outward. That's not pretty. I'm thinking of adding one more row of boning at the bottom. I may wait until the garters are attached to see how the fit is when anchored down though. 

Look at that straight 1920's silhouette!

February 24, 2010

corselet casings


The boning across the belly will be contained in pre-made bone casing tape. The tape is available by the yard in different widths and in black or white. I'm using 1/2 inch wide black tape.


I basted each casing in place, folding the open end under at one end, but leaving the other open so I can slide the boning in. Then I laid artist's tape across the front as a guide for stitching. Even though I used low tack tape I did not want the adhesive pulling the brocade so I stuck it to my jeans a few times before putting on the corselet. 


Since the basting was at the top of the casing I sewed the across the bottom of the casing first. I don't know if It would have made a difference either had I sewed across the top first. Probably not. After the first line of stitching was done I sewed the second right on the basting stitches.


The first casing from the front.


And from the back.


Now the question, flat or spiral boning?

February 9, 2010

hook & eye tape - eye side


Just like I did for the hooks, I lined the eyes along the basted line.


And pinned the tape in place, this time eyes to the face of the fabric.


I sewed just 1/8 inch from the edge because I hadn't planned ahead enough while patterning to allow extra fabric to cover the hooks. Novice pattern maker. 


That's so close, ironing the teeny tiny allowance brought home why seams are sewn with allowance, then trimmed. After pressing and folding everything in place, I basted so I wouldn't have to deal with any more pins while sewing. I sewed once, a bit over 1/4 inch from the edge to secure the eyes.


And once more to secure the edge of the tape.


From the reverse.


And hooked together.


I can not explain how happy I was when the hooks were covered. Now on to the boning and then the shoulder straps. I've hit the light at the end of the tunnel phase!

February 8, 2010

hook & eye tape - hook side


I am so glad I basted to mark hook & eye placement. I know I would have screwed this up if I hadn't. 

I started by laying the tape on the face side of the corselet, lined up the inside of the hook with the basted line, and noted the distance between the edges since they didn't meet up. Then I pinned the tape to the back side of panel, hooks to the fabric, keeping that same distance between edges. Here it is pinned in place.


And here is a view from the front after sewing the pieces together.


If I did everything correctly, when I folded the tape around the inside of the hooks should line up with the basted line.


Yes. Then the I sewed right next to the hooks.


After tucking the loose edge of the tape under, pressing, and pinning, I stitched one more time, right next to the other side of the hooks.


Yea. On to the eyes.

February 3, 2010

marking hook & eye placement


The hook & eyes have to meet right where the seam line would be if the front and side were sewn together. So I can line up the tapes perfectly I thought I'd mark the placement by basting a line of thread on the meeting point of both pieces. 


Taking no chances, I measured the seam line/meeting point with the shuriken so the basting would be accurate. I basted one line three times because I forgot to knot the end of the thread and pulled it out. Twice.
 
And yea! 100 followers! There is still time to add your name to the list for the tailor's shurkien drawing. Just leave a comment on the original post by midnight, pacific standard time, Thursday February 4th, and you're in.

January 31, 2010

elastic gores in


The elastic hunt ended in spandex. After a great tip on where to find 12 inch elastic, (Thanks imblebee.) I realized the gores measured almost 12 1/2 inches long, before adding any seam allowance. Only after going with the spandex back up did I see the comment about sewing pieces of elastic together, (Thanks again imblebee!) which I really wish I would have done. Very Herve Leger. Much nicer than than what I ended up with, though what I ended up with isn't horribly bad. 

I made each gore two layers of spandex, and basted the layers together. I attached one side of the gore to the back of the corsetlet, seam allowance to the outside, trimmed, folded, and pressed just like the other flat felled seams. I pinned the folded edge in place, leaving the tail I patterned hanging out. The tail is there to give me something to work with, something to grip  when when working on this finicky area.


I sewed 1/16 from the fold just like before to make a flat felled seam on one side of the gore. Then I pinned the back piece with the gore to the side piece and treated them as one piece. One long seam was sewn to attach them, then I trimmed the seam allowance on the one side.


After the usual folding and pressing I pinned like crazy to hold everything in place for the last pass.


And here is a close up of join.


Not bad at all. I should say it took me an entire day to sew both gores in. I had to psyche myself up before each step. Once, I realized I was actually pacing back and forth thinking about the sewing involved, and I'm normally not a pacer. Here's a shot of the corselet so far.


Hook and eye time!