Showing posts with label 1650. Show all posts
Showing posts with label 1650. Show all posts
October 4, 2012
getting my eyelet mojo back
The eyelet-a-lunch-break plan is working. You can see it took a few days before I regained lost eyelet skills.
The eyelet on the left is the first one done after a two year break. (Two years?! Yikes.) It's pretty sad, but yesterday's eyelet, on the right, is a perfect little wagon wheel. Thanks for all the words of encouragement!
September 28, 2012
one eyelet down
It's just one eyelet, but it's a start.
Or rather, it's a continuation. I'll stitch another one during lunch today, maybe even two. Well, I shouldn't get overly ambitious. For all of you out there picking up abandoned projects we'll just keep stitching together. One eyelet at a time.
September 27, 2012
one eyelet at a time
I have to finish the 1650s bodice. And the 1844 corset too, but I can start on the 1650s today by tackling an eyelet a day during my lunch break.
Above is my work kit, ready to be rolled up and carried in a tote bag. There are a lot of eyelets to be sewn so I need to just sit down and start sewing. Anyone else out there sewing eyelets? How about just picking up a project that you've put down for too long?
December 7, 2011
christmas, a couple weeks early

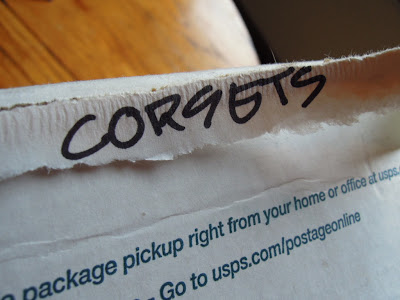
When I opened it I found this.

The 1650 bodice! And wrapped in packing paper was this.

The 1925 corselet! There was a reason I couldn't find these, they were still in California! I had planned to take them with me when I drove to my new home across the country, but space was tight in my tiny car and I left a few boxes behind. A shout out to Lisa, the best friend anyone could have, who found this box and sent it my way. Thanks Lisa! I miss you!
The grommets are set in the 1844 corset, it's ready for gore fitting this weekend.

Then I'll tie up the loose ends of the corselet and it can move to the completed pile. That means I should have two finished corsets by the end of the year!
June 20, 2010
stupid eyelets

The first one, on the far left, I pushed the awl from the front of the fabric to the back. For the second I pushed the awl from the back to the front. I punched a small hole through the fabric for the third. And the fourth finally looked decent, but it was only through two layers of fabric instead of four, like the others, and I'll be working with four on the final piece because of the seam allowances. On the chance that maybe it wasn't just lesser layers that caused the improvement, but that I actually got better over the course of just four eyelets, I sewed one more.

It was me that got better! This eyelet is stitched through four layers of coutil with heavy duty thread. The pattern shows 58 eyelets so I better get to work.
June 15, 2010
1650 bodice foundation

The final boning channel panel was pinned in place at the center front.

Then I sewed, pressed, and folded the panels around just the way I would on the center front of a corset with a busk, except that I don't have to insert a busk because this bodice will lace in front.

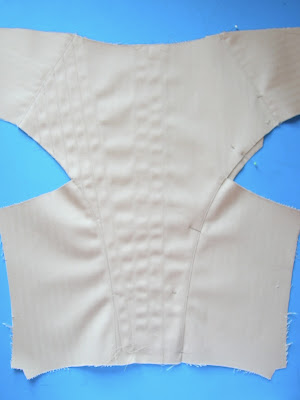
Then the channels were sewn. You can see above that the seam at the center front is the only one I didn't trim, that's so there is more fabric for the grommets to grip. Once all the channels were done I sewed the front and back halves together at the side seams. And pressed. And graded. And pressed again. Here it is from the side the will be covered with the fashion fabric.

And here it what it will look like from the interior.

The question now is how to finish the holes for the lacing? The holes are close together, just 1/2 inch between each. Grommets will take up a lot of space, but hand bound eyelets? I knew sooner or later I'd have to tackle hand bound eyelets, but is that time now?
June 11, 2010
foundation construction

before I added the channel pieces I sewed the other pieces together, stay stitched, then graded the seam allowances.

Then I laid the channel pieces in place and stitched using 1/2 inch wide tape as a guide to keep the stitch lines perfect.

Here is the back of the bodice foundation partially completed.

And here is what it will look like from the interior of the garment.

Nice and clean. I am worried about the waviness happening. I pressed the fabric before I cut it, after it was stitched together, and again after the seams were graded, but the waves. I believe it will be gone once the boning is in place, but still. Stupid waves. Anyway, I'll build the front of the bodice foundation the same way then stitch them together. Then the lacing, then I'll move on to the outer layer and the sleeves.
June 7, 2010
1650 pattern and foundation fabric

Easy enough. The bodice foundation will be made of flesh tone coutil imported from England.

Such nice fabric. The exterior and the sleeves will be made of linen I have in the stash bins. I haven't decided whether I'll expose the front lacing on the final garment or not. Thoughts?
June 5, 2010
the worst pictures of the best fitting

It's hard to see past those giant seam allowances, and I couldn't lift my arm to get a better shot, but I swear it fits perfectly. Wait, let me me put it on again with the seam allowance to the inside.

There is some digging into my waist at the back, but I think that's caused by the boning in the 1 inch seam allowance. When I chalked in a waistline it was right where the seam line is on the pattern. The seam allowance along the neckline will also be gone so that area will look much prettier.
How often does a pattern work as is? Never!
June 4, 2010
this is going to turn into something pretty

I'm trying something new this time. With the last pair of stays I altered the pattern, then had to put back in what I took out. This time I sewed the pattern as is with no alterations. I used a 1 inch seam allowance on all the pieces so there is plenty of fabric to make adjustments. Since this bodice laces up the front there will be no gap, that's an inch on each side that I don't have to take away at the waist, so the pattern should work. My biggest worry is how the shoulders will fit.
I have exactly one month to finish this bodice if I want to keep my deadline. Let's hope this fitting goes well.
May 27, 2010
look what just arrived!

I ordered it from Vogue Fabrics at 10 pm Monday, and here it is Wednesday afternoon. Wow. I'll probably use cane for the mock-up because it's cheaper, but it will be good to have the best possible whalebone substitute I can find for the finished piece. Silly whales. Why did you have to be so useful for fashions and cosmetics so we hunted you to near extinction?
May 20, 2010
sleeves
Thanks to all of you who shared your opinion regarding sleeves. I'm going for it.

Those two sort of crescents to the right of the sleeves are the tassets, or, as they appear to be in the photograph on page 32 of Corsets and Crinolines, sewn together tabs.
I haven't decided on the fabric for final bodice yet, but the finished piece is starting to form in my mind as a post modern pirate blouse. Can anyone else envision linen and raw edges?
May 18, 2010
going back to 1650
Page 36 of Corsets and Crinolines has a boned lining of a bodice in silk moiré. Here it is after I've enlarged the pattern, first 200% then 207%.

The notes say it has, "large elbow length sleeves with cuffs sewn into the arm hole and fine pleating on the shoulder. It also has a basque made of twenty-eight small tassets sewn together." I happen to have a copy of Norah Waugh's The Cut of Women's Clothes: 1600-1930 and the complete pattern, with sleeves, is printed there. There is a lovely painting by Gerard ter Borch at The National Gallery, London, A Young Woman Playing a Harpsichord to a Young Man, which shows what the bodice would look like. Pretty. Maybe I should go ahead and add the sleeves.
Either way I'm finishing this corset/bodice by the Fourth of July. That's six weeks. I can not stand how long the corselet took. That means no searching for special ribbons or fasteners, no getting sidetracked by travel, no dilly dallying. So while I'm patterning I ask you, To sleeve or not to sleeve? That is the question.
Subscribe to:
Posts (Atom)


