This is a picture from the original manual. My machine-to-be was manufactured in 1905 and will look just like this one, including the seven drawer cabinet. I just need to figure out how to get it to my house and up the staircase!
December 31, 2010
December 24, 2010
frustration in corsetland
Ugh. This is not the 1844 corset, which I should have been working on, but another one instead. I marked the waist line and carefully lined the waist tape against it then anchored it place when I sewed the bone casings on. But look, one side I lined the top of the tape to the mark, the other I lined the bottom to the mark. I didn't catch this until it was time to insert the busk. Dang it. I am going to do my best to rise above this aggravation and forget about sewing for a few days.
Here's wishing you all a wonderful holiday season!
December 20, 2010
post edwardian corset on the body
I had a request for an image of the corset on a person to see how it sits on a body as opposed to a dress form. Good idea.
The top edge of corset sits below the bust and the bottom edge skirts the very top of the thighs. Look at that curve down the back! I love that line. Here is a view from the front.
Such a smooth, long line, silhouette. Even with the hips completely covered the model could jump around because the center front is open below the busk allowing a good range of motion. The original had a hook & eye placed 1/4 inch below the busk, which I eliminated on the reproduction. Had I included it I don't believe it would have closed the front enough to significantly hinder movement.
I haven't worn this corset myself so I can't give more information about how it wears. I should make an effort to do that. But first I'll try to get some more sewing done on the 1844 linen corset.
December 15, 2010
titanic era corset and pattern
Here is a picture from the auction listing.
Not pretty. In addition to the general grubbyness seen here, the garter grips were rusty, bones were poking through casings, and the steels along the center back were bent. I probably would have been disappointed if I paid more than the $20 I bid. There was no information about the corset when I purchased it, so to help date it I made a timeline that illustrates the changing silhouette from 1900-1919.
The shape of the corset is almost exactly like the silhouette from 1911 on the timeline. Based on that, on the cut and construction of the original, and allowing for the fact that the corset's owner may or may not have been on the cutting edge of new trends, I'd say the antique corset I bought was produced between 1910-14. The original was made of plain cotton drill, but I spiffed mine up a bit by using cotton mattress ticking and the prettiest cotton lace ever. Because I like to show my work, here is a view of the interior of the corset.
I was so happy with the way this corset turned out. I'd been wanting to experiment with mattress ticking for awhile and it worked quite well. Here is the pattern if anyone is interested in constructing this corset.
This pattern will fit on an 8 1/2 x 11 piece of paper and is a high enough resolution that it should enlarge well without pixelling up. If you do sew a corset from this pattern I'd love to hear how the pattern worked for you. And to see other interpretations!
December 1, 2010
a carved busk?
© Providence Public Library (identification number 008)
I love the naïve quality of the artwork. It's carved on whalebone and you can see future Sailor Jerry's tattoos on this busk. Here is an older one made of wood that was carved in 1783 and is part of the Pinto Collection at the Birmingham Museums and Art Gallery.
© Birmingham Museums and Art Gallery (accession number 1965T600)
Below is an even older metal busk from the 17th century belonging to The Metropolitan Museum of Art's Costume Institute.
© Metropolitan Museum of Art (accession number 30.135.32)
Notice how they are all decorated? I feel like I should jazz mine up with something. To fit the mock up I can use a couple 1/2 inch wide steels, but for the finished corset wouldn't a decorated busk be nice?
November 29, 2010
two and a half napkins
I've laid the pieces on the cross grain because the notes about constructing early nineteenth century corsets found in Appendix I in Corsets and Crinolines read, "stays are usually cut in four pieces, all of which are generally upon the cross, as this assists materially in making them set better to the figure." I'm all for things setting better to to the figure. The instructions were taken from The Workingwoman's Guide and my favorite thing about them is the author's credit, which reads, "by a Lady, 1838." Thank you anonymous Lady for taking the time to write down how you made stays.
These pieces will use 2 1/2 of the 6 linen napkins, and will become the interior layer of the corset. That will leave plenty of fabric for the exterior, and should allow me a bit of room to do some organized placement of the jacquard pattern. Yea.
Time to mock up!
November 26, 2010
go bucks
I made this corset quite a while ago.
And a view of the front.
I thought burgundy flossing and trim would really set off the anthrazite dupioni. It did. And yes, that is the way I described the colors in my mind as I was working. But once the corset was finished all I could see was The Ohio State University's scarlet and grey. So in honor of tomorrow's football game against Michigan I present what I now always think of as the Go Bucks corset.
Go Bucks!
November 25, 2010
wishbone
November 24, 2010
vogue patterns magazine
How cool is that? A big thanks to Vogue Patterns Magazine for the nice review and for bringing my project to a few more people. As it turns out the issue was totally worth buying because Claire Schaeffer, author of Couture Sewing Techniques, has written wonderfully clear and well illustrated instructions on how to sew godets. Information I can put to use when I sew the bust gores of the 1844 corset.
By the way, is there a difference between a godet and a gore? Is a gore just a godet that lays flush against the body instead flaring loosely away from it?
November 22, 2010
ready to trace & which side is up
Before I trace it onto the fabric I have to decide which side will be the face. From one side the weft threads float on the surface making the flower motif recede, or appear darker on a light background.
From the other the floats create the design, bringing it forward so it appears lighter on a dark background.
I'm leaning toward the lighter flower on darker background because that means more of the longer floating threads will be on the interior and thus less prone to snagging on something. But is there a preferred side to use?
November 18, 2010
a new use for napkins
I dug through my storage bins to see what suitable fabric I had for the 1844 corset and found a roll of uncut linen napkins that will be perfect. Here is a lovely out of focus image that captures some of the design and the checkerboard cutting line.
And here a close up of the selvedge side of the roll in its piled-in-the-box, un-ironed shape.
I found this fabric at a thrift store a couple years ago on a 50% off all linens table. The safety pinned on tag read, table runner $2. I laid down my dollar and waltzed away with 6 uncut, crisp and clean, damask napkins that I knew would eventually become a corset. At 22 inches wide and 124 inches long there should be enough to get the job done.
Yea! Back to corset work.
October 18, 2010
the nicest place to sew at stan hywet
This pretty little nook was upstairs at the Stan Hywet House in Akron, Ohio. Stan Hywet is the estate built by F.A. Seiberling, the founder of The Goodyear Tire and Rubber Company. Definitely worth a visit if you find yourself in Akron. I'm going to have to make a trip back to take the tour of the domestic and service areas because my guess is any servant treadling away on a Singer would not have had such a nice window with a a pretty view nearby. But I could be wrong. It is a perfect space to sew though and it's inspiring me to move my machine away from the wall it now faces and tuck it in front of a window. I just need to find the right window.
October 8, 2010
jet setting and a new book
Yea! Underwear: Fashion in Detail by Eleri Lynn! I have been anxiously waiting for this book to be released since I learned last year that it was being published. I was at the V&A the day it became available and snapped up a copy. Here is what happened while I was at the counter paying for it.
Me: "Yea! I've been waiting for this book to come out for months."
Clerk: "It's a great book."
Me: "Oh good. I haven't even flipped through it yet. I can't wait to sit down and take a good look. Oh! Would you take my picture with it?"
Clerk: "Of course. Will you be signing them later?"
Me: "What?"
Clerk: "What?"
Me: "Signing?"
Clerk: "Are you the author?"
Me: "No."
Clerk: "Oh."
To his credit the clerk did not loose enthusiasm for picture taking after he realized I was not the author. In fact, he kept retaking pictures because he felt the light wasn't good, or someone walked in the background, or the photo was poorly framed. I admire that kind of dedication. Go V&A.
The book is filled with close up photos, diagrams, and descriptions, of a variety of undergarments from the V&A Fashion, Jewelry, and Accessories collection. There is something for everyone, nightgowns, stockings, Queen Victoria's drawers, men's underwear, bras from all eras, stays, garters, crinolines, and of course, corsets. Like all of the Fashion in Detail series, the items shown are beautifully photographed and the descriptions are clear and informative. The red damask stays that inspired me to tie the shoulder straps on my 1780 stays in the back are there. There's also a plain white satin corset from the Christian Dior autumn/winter 2006-7 collection that is somehow inspiring to me because it reminds me that even the best in the world need multiple fittings and deal with the same with fabric problems we all do. It's still gorgeous even with the imperfections.
I'm going to sit down now with a cup of tea and do some more reading. Then hopefully I'll get around to sewing.
September 17, 2010
starting on 1844
I still haven't found the 1650's bodice foundation. I was sure I would have found it by now, but I'm starting to think I may have to start again from scratch. I haven't given up finding it yet and hopefully I'll stumble across the bodice while working on the next corset on the list.
The pattern on page 77 of Corsets and Crinolines, is described as "pattern for corset; to be boned on each seam (1844)." This is the pattern I used to make my very first corset. I'm confident this version will turn out much better than that learner's permit one. Here's the pattern enlarged to full size.
I believe the corset would have been constructed from two layers and the boning sandwiched between the layers, not placed in separate casings. However, the boning on the pattern looks like it straddles the seamline so maybe not? Thoughts anyone?
I want to make this corset the way a home seamstress might have way back when. My guess is most women didn't have the luxury of extra fabric to make a fitting toile with, they would have already made several garments fit to their body already and had a fairly good idea what their figure needed, so for this one there will be no mock up. I'll cut the pieces with extra wide seam allowances, sew it up, make alterations, and live with it. It is stressful just thinking about making it that way, but that's exactly why I'm doing it. You know, trying to conquer sewing fears and all.
August 27, 2010
must move forward
There were several other corsets and stays, but no partially finished bodice.
This means I packed it with something else, which probably seemed very wise at the time. I'm ready to get back to sewing, so I can either frantically search through everything again and not take another stitch until I find the bodice, or I can begin work on the next corset. This does mean I'll have an unfinished project hanging over my head, but I know I'll eventually find that bodice. I'll decide it's time to reassemble the Venetian chandelier and there the bodice will be, wrapped in tissue paper hiding beneath the top layer of bubble pack. Until then, onward.
August 18, 2010
unpacking
I've managed to take the boxes of books from this,
to this.
It's a start. I have not hit the box with the 1650's bodice in it yet. I better find it soon. Those eyelets won't stitch themselves.
August 11, 2010
conner prairie
You can learn a lot from looking at pictures, but there is nothing like seeing the real deal. A huge thanks to Jenny who arranged a hands on look at some of the corsets and stays in the collection, and to Lana, the collections manager, who took the time to pull the garments out and gave us gloves and a magnifying lamp so we could inspect everything closely. So fun!
Stay with Decorative Stitching. 1831. © 2009 Conner Prairie
These stays were just one of the treasures that were brought out to learn from. They were made for a girl by her mother, and the busk was made by her father. I also got to see this old time bust support.
Bosom Support. circa 1880. © 2009 Conner Prairie
The description reads, "kidney-like shaped pad, stuffing is man's facial hair covered w/linen." It felt crunchy when squeezed, not at all like the hair stuffed pin cushion I made.
It was wonderful to meet Jenny, and Conner Prairie was so cute. Maybe cute is not the word. You step into the 1800's when you enter the park. How about so educational? Or so entertaining. You get the idea. If you can't make it in person you can access some of the textile and clothing collection through IUPUI Digital Collection. Once you dive in there you could get lost for a while. Have fun!
August 4, 2010
the official summer corset photograph
The details come through really well in this shot. If you know where to look you can just make out where the major cleaning was needed. But don't look that hard.
July 29, 2010
edwardian posture - ideal vs. reality
The new snug hip! Let's compare the illustrated model's posture to a few photographs of actresses wearing the latest fashions.
They are all standing like upright citizens with good posture. The third lady from the right comes closest to the ideal, and the draping on her bodice definitely helps her achieve the desired look. For fun I laid a piece of vellum over the photo and drew the American Lady corset on one of the ladies to see how it would fit.
Very shapely. But still not leaning forward. And not nearly as long and slim a line as shown in the ad. By the way, the actress with the exposed corset is Maxine Elliott and quick search will result in tons of beautiful pictures of her.
July 22, 2010
warner's rust-proof corsets
Pretty, pretty, pretty. The copy explains how Warner's has advanced corsetry with rust-proof boning, stocking supports, and "now in 1908 the standardizing of the construction of our 61 styles, so that every corset bearing the name of Warner's, whether selling at $1.oo or $5.00, shall be equal in wear and unbreakableness." I love that word, unbreakableness.
I found the magazine at a garage sale tucked between a 1978 JC Penney catalog and a Sears catalog from the same era. Not wanting to alert anyone that I had found something cool, I kept it between the two telephone book sized catalogs and said, "I'll take these three." "At a quarter each that'll be 75¢." Score!
You learn a lot about how women lived when you look at an antique magazine like this. In addition to stories, cooking advise, and household tips, there are several pages of the latest fashions for the lady of the house and her children. There are ads for the things you'd expect, hats, cleaning products, and food. And some for things you might not, like the two ads for raising poultry at home.
July 20, 2010
fun news
July 15, 2010
corset tour 2010
July 13, 2010
light as a feather, stiff as a board
I'm still dealing with hand issues (Why won't the swelling go down? Or rather, why does it go down, but reappear as soon as I use my hand?) so I thought I'd share this corset I have. So pretty. This is a circa 1890's corset. It appears to never have been worn. Made of a single layer of cotton, with whalebone boning except for the busk, underbusk, steels along the center back, and one at each side. So it is indeed very light. And this corset is tiny. The waist is only 20 inches laced closed. Tiny!
It has the original lacing too. Things like this are nothing but fun to study. A friend once called me a corset nerd, but I'm not the only one who finds these pieces fascinating. Right?
July 5, 2010
a skirt in a day
The fabric is denim pulled from a $2 a pound bin and the pattern was the easiest pattern ever. Vogue 6702.
I'm not certain what year it was published. The original price was 40¢, the pattern was for only one size, and pieces were precut. And look how the pieces were marked.
Somehow futuristic and old-y time-y at the same time. I'm thinking maybe the later 1940's. Any guesses out there?
June 27, 2010
baleen
Bone casings salvaged from an old victorian bodice. And what was the boning hiding inside?
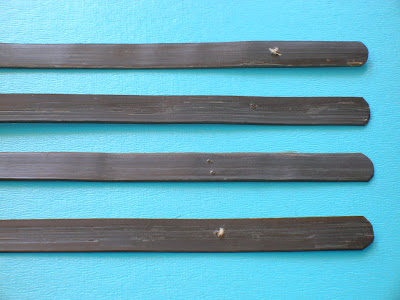
Unless I'm mistaken, that's whalebone. I am not going to store this in a drawer of sacred things. There are 13 pieces measuring between 9 and 5 inches, enough to provide support for a ribbon corset, so I plan on using this. To the whales I say, thank you. I know the way we used you was horrible, but it seems like it would be equally bad to not use and appreciate this baleen now.
I've never seen genuine baleen before, if anyone out there has please let me know if I'm correct in thinking that is what I have. And if you've been fortunate enough to work with old whalebone is there anything I need to know ?
June 26, 2010
ow
I wish there was an exciting story about how it happened, there isn't. Hand sewn eyelets were not at fault, just a casualty. The last stitch I took was Tuesday. I'm debating completing the stays with grommets instead of eyelets so I can keep my deadline. Self imposed or not a deadline is a deadline. Right?
June 20, 2010
stupid eyelets
The first one, on the far left, I pushed the awl from the front of the fabric to the back. For the second I pushed the awl from the back to the front. I punched a small hole through the fabric for the third. And the fourth finally looked decent, but it was only through two layers of fabric instead of four, like the others, and I'll be working with four on the final piece because of the seam allowances. On the chance that maybe it wasn't just lesser layers that caused the improvement, but that I actually got better over the course of just four eyelets, I sewed one more.
It was me that got better! This eyelet is stitched through four layers of coutil with heavy duty thread. The pattern shows 58 eyelets so I better get to work.
June 16, 2010
instead of sewing eyelets I made hair extensions
I bought wavy brown human hair at a local beauty supply and dyed it with Clairol to match my hair. After it dried I ironed the track of sewn hair so it wouldn't have hard kinks from being folded in the original packaging.
I cut the hair into 8 inch sections and folded them in half so the track was doubled and the finished extensions would each be 4 inches wide. I stitched on wig clips. Once they were clipped into my hair I pulled them back into a luxurious loose pony tail.
Voila. Instant long hair. Not bad for just $40.
Subscribe to:
Posts (Atom)