July 31, 2009

hong kong finish


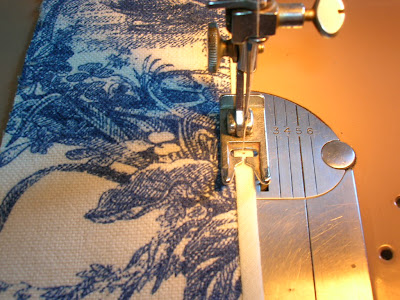
The Toile tends to fray so I'm finishing the edges of the fabric in a totally non-period manor. The Hong Kong finish. Aside from encasing the edges to protect them, it gives the finished seams the prettiest look. And it's easy too.

Start by laying 1 inch wide bias trim along the seam edge of the fabric, which is face up. Sew about 1/4 inch from the edge. (I have small seam allowances so this example is sewn at about half that distance.)


Fold back the bias and press, then fold it to the underside of the fabric and press again. Stitch down about 1/8 inch from the edge. (Again, mine is smaller.)


Done. 


I trimmed the bias allowance on the underside to 1/4 inch, but with wider seam allowances that wouldn't be necessary. Here's everything after the seams are sewn together and the allowances are pressed out.


Isn't that pretty? I love it. I'm going with the off-white thread by the way. I've never used this technique before and it does take a little extra time, but not much. And I think it will be worth it because when the stays are done they will look extra nice from the inside.

July 30, 2009

stays cut


Seam allowance was added when the patterned was traced onto the fabric. 3/8 inch looks so small when I'm used to seeing 1/2. There is no seam allowance on the bottom or sides of the tabs, the neckline and underarm, or the shoulder straps.


The Toile is not flimsy, but it's not the tightest weave so I thought I should beck it with something to help stabilize it and also prevent any show through of the denim. This is the cotton voile (Or is it batiste, what is the difference? And this also came from the fabric stash.) that I affixed to the back using Sullivan's Quilt Basting Spray


I don't expect it to completely "eliminate tedious hand basting and pinning" as the label claims, but I do think it will help hold the thin, floaty voile in place while I baste.

July 28, 2009

the rest of the supplies


The boning for the stays will be sandwiched between two layers of fabric, the exterior Toile layer, and an interior denim layer. The edges will be bound with navy bias binding.


The denim was purchased for a quilting project because it was lightweight and the perfect indigo. When I had difficulty getting a needle through I took a better look at the fabric and saw it had a super tight, super small, herringbone weave. I thought, hmm, this might work well for a corset.


I already have thread to match both the off-white of the Toile and the blue of the denim so off we go.

July 26, 2009

laying out the stays


The fabric went from this,


to this.


The area is roughly 20 x 44 inches. By reducing the seam allowance from the 1/2 inch I normally use, to 3/8 inch, I can just get all the pieces to fit.


I didn't realize when I chose this fabric I would be literally cutting it so close.

July 24, 2009

fabric decided


After plenty of deliberation the fabric for the stays has been chosen. I think those of you who commented about the Carolyn Quartermaine are right, it would be fabulous. But I also think I'd better hone my sewing skills before cutting into it. I should know how to really handle silk, does it need to be backed with something? Will it pull when I sew it? How fiddly is it when sewing? Such nice fabric also means the rest of the materials must be the highest quality, maybe linen canvas underneath, and silk thread, and I haven't worked with either yet. And what about boning? Will cane or reed be what I need, or will plastic boning be better? In other words, no experimenting with the good stuff. It was a tough call. But I already have an idea which future pattern the silk script can be used for. 

So it will be Toile for this one. I made a mask and laid it over a few of the fabrics from the stash.


The print is too dense on the first one, and too small on the second. It's the right size on the third, but a bit too contrasty. But look at this one.


The motif is the right size, there is just the right intensity of color, and there is a nice balance of white space. La Petite Ferme by Waverly. This piece of fabric was made into a slip cover for a bench, one of the first things I ever sewed. It's been off the bench for quite a while now, and it seems very in the spirit of the 18th century to reuse fabric. 

July 21, 2009

stays patterned


I am no longer worried about the armhole and neckline being too low. After cutting a second front panel, with the neckline 1/2 inch higher and the shoulder straps moved in 1/4 inch, I sewed it to the mock-up and it looked terrible. Those changes were too much, the stays didn't look right. Attaching the longer straps did not solve the bow inward at the top back, so I took off almost 1/2 inch from the top of one of the back seams in a straight line to the waist. To maintain the chest measurement I added that 1/2 inch back in on the front piece, putting back exactly what I took off during the first alteration. I'll spare additional fitting pictures and just show the finished pattern.


Look how nicely the armhole curves flow together.


It's curves matching up like that that make patterning fun.

I am going to have the straps tie in back. There are many more stays patterns in the book and all the shoulder straps tie in front, so why not. And starting the straps at the front creates a nice, non-broken, neckline. I've also quit worrying if the back is high enough. The top back of the V&A stays is midway between the underarm and shoulder and that's about where mine is so I'm leaving it.

© Victoria & Albert Museum (museum number T.120-1969)

July 20, 2009

stays mock-up round 2


A definite improvement over the first mock-up.


I'm still not sure about the neckline and armhole though. The armhole starts about where the top edge of a bra would sit, so lower than a regular armhole, but maybe that's where it's supposed to be. To be certain the neckline was OK I skipped underthings (not possible with the first mock-up) and I guess it's alright since I think it's supposed to be low. The shoulder straps are sitting better, but I'm wondering if I should bump them in another quarter inch. I don't think I need the extra length to the tabs so I'll knock off a bit. Now the back view.


Not bad. From the back it's easy to see the distance between the the arm and armhole. I made the shoulder straps longer, but still not long enough. I think it's pulling in  at the top because the straps aren't tied in place. To be sure I'll make longer straps and do another try-on.

July 18, 2009

patterning the stays round 2


An inch and a half seems like a huge amount to add between the waist and bust lines, but that's what I went with.


I also added a half inch along the bottom, figuring if the area above the waist needs lengthening the area below should be lengthened too. During the mock-up try-on I marked the waistline then transferred that line to the pattern. The pattern piece (second from right) that attaches to the center wraps around the waist at an angle, so the waistline does not run straight across the way I had originally measured. To get the correct waist measurement I took a bit out of all the pieces, except the back, through the center of each piece along the grainline. For reference, the waistline on the original pattern is roughly 26 inches.

Hopefully the second mock-up will fit better than the first.

July 16, 2009

yikes


This doesn't look right.


Yet even with the rough construction, and way too low neckline and armhole, you can see the silhouette coming through.


I'm going back to the drafting table and will lengthen the body to raise the neckline and armhole 1 1/2 inches. Maybe 1 3/4. The bottom center front looks like it could be lengthened just a bit too. Hooray for mock-ups.

July 14, 2009

patterning the stays


This was the quickest patterning ever. After enlarging the pattern, 200% then 200% again,


I guessed the bust and waist lines to figure out the bust and waist measurements. Very little adjustment was needed. All I did was take a little off the side seam of the front piece and blend it into the point at center front. 


I trued the seams, added notches, and boom. Done.


It's already time for the mock-up.

July 9, 2009

jumping back to the 18th century


It's time for stays! On page 42 of Corsets and Crinolines is a pattern for stays from 1780 that looks like a good place to start. The copy reads, "Half boned stays, covered in red silk damask, the stitching for the bones which shows on the outside is white, and the seams are outlined with a narrow white silk ribbon." The V&A has red stays (It's tough to tell without a high resolution picture, but that fabric does look potentially damask-y.) with white stitching and thin white ribbon that look like they may be the stays this pattern was made from. If not, they're pretty close.

© Victoria & Albert Museum (museum number T.120-1969)

There isn't much information given about these stays though because the page is highlighting the side hoops. But there are images from several angles. The back view shows the shoulder straps tie in back. Hmm, something to think about. Fabric-wise, I'm thinking maybe it's time to dive into the bin of Toile de Jouy.


Or maybe I'll be super decadent and use this Carolyn Quartermaine silk dupioni.


Both seem era appropriate, though cutting into the silk scares me. I have time to decide though while I work on the pattern. If you think one would look fabulously better than the other let me know!

July 8, 2009

late 1880's summer corset on


It's on! And thanks for all the encouraging words and suggestions while I was working on this. 


I don't think a summer corset would ever be worn over black, but I wanted the see-throughness to show. This corset does create a long silhouette. I ended up with a very straight front, it doesn't scoop in at the waist and cup over the belly like I had expected. Maybe it would have had I used a 13" busk instead of a 12"? Or maybe that will happen if I lace all the way closed? I am impressed with the cane. This corset is very lightweight but gets the job done.


I took 3/4 inch off the bottom center front of the original pattern and blended it into the side at the hip resulting in a softer curve along the bottom front. I could have taken that 3/4 inch off all the way around and kept the nicer curve. The drop at the center front on top could have been a tad less, and the straight edge I patterned appears scooped when worn. I am so glad I raised the bust and added an extra 3/4 inch at the top edge. If I hadn't I'd be overflowing, and that's not pretty. But that wrinkling above the cording bugs me. I like the more angled look of the cording, and it does add support. I imagine if I had made it more horizontal as originally patterned I would have a slightly wider bustline. 


As it's laced here the corseted waist measures the same as my natural waist, no reduction, just reshaping. I love the back top edge, and think the flossing looks nice. There are a few bones that go right to the binding and I could floss right through the cane. Neat. All thread used for the flossing on the bone casings was waxed and ironed. Ironing made it even smoother than before and it looked like high-end dental floss. Learn a lesson from me though, do not experiment with leftover thread to see if it works like dental floss. It does, until you hit molars, then it breaks and you will have to find a pair of tweezers to pull the thread from between those back teeth.

All in all I'm pretty happy with the way this corset turned out. I like the colors and the contrasting thread and I'm pleased with the quality of construction. If I sew this pattern again the big change I'd make would be to take another inch off the waist. Lots of things learned, lots of things to apply to future corsets. 

Next up: 1780 stays

July 6, 2009

1880's done

Yea! 


And with the laces.


I'm hoping once on the body some of those wrinkles will disappear. Keep your fingers crossed. In the meantime, here are the stats.

approximately 1 square yard cotton adia cloth
3/4 yard - cotton coutil
6 yards - 1cm double faced satin ribbon
1/3 yard - 6mm double faced satin ribbon
2/3 yard - 3/4" petersham ribbon
3 yards - cotton string
1 1/2 skeins - cotton embroidery floss
3 - spools thread
1 - 12" spoon busk
34 - double zero grommets
2 - eyelets
8 yards - 8mm chair cane
54 inches - 6mm flat steel boning

number of seams picked out - 52


July 5, 2009

still flossing


Flossing is making this corset look surprisingly fancy.


I stitched several samples an decided this literal Eiffel Tower interpretation was too much.


Over the top, right? But I felt I needed something just a little over the top for a Gilded Age corset. I had a limited amount of embroidery floss so I worked out the design I used so I could get the most effect from the the minimum amount of thread. Here's the diagram.


Now all I need to do is add the ribbon for the laces!!!

July 2, 2009

flossing begins


Embroidering through multiple layers of coutil is more like repeated stabbing than stitching. It doesn't look too bad from about 4 or 5 feet away. Not perfect, but not terrible either. But it's moving along.


The tailor's shuriken has been vital in keeping the triangles a consistent width.


I ran the thread through beeswax and I haven't had a tangle up yet. Look at the difference between the two threads on the right, just separated from 6 strand embroidery floss, and the two on the left, which have pulled through beeswax.


I was concerned the wax would make the thread all gunky and it would dirty the fabric, but nope, it just smoothes it. Neat.