September 28, 2009

skull & crossbones


Two more hours of hand sewing binding and I've arrived at the tabs. Progress, but not photo worthy progress. Did I mention it was slow going? In the meantime I thought I'd show you the happiest skull and crossbones ever.


My son wanted to join in on embroidery fun so I gave him a piece of leftover adia cloth from the summer corset and told him to draw something to stitch. I never would have come up with something so cool. 

September 25, 2009

3 hours, 45 minutes of progress


It's slow going.


I keep telling myself they way to get better, and quicker, at hand sewing, is to hand sew.

September 23, 2009

a plan for strengthening the back edge


Who am I kidding? A single reed down the center back is going to give, I don't really need to try the stays on the stays to find that out. So the binding that will run around the edges will also go along the center back, and I'll lay another reed in there to strengthen that edge. I placed the 1 inch bias trim along the edge on the face of the stays and stitched it down right against the reed in the center back channel.


Yep, the binding will all be sewn on by hand. I don't want to chance snapping reeds when wrestling the stays under the sewing machine needle. I thought I was using a back stitch, but realized I'm not. The diagram in my copy of The Complete Book of Embroidery and Embroidery Stitches, by Catherine Christopher, written in 1948,  clearly shows the needle goes back into a spot it earlier came out of. 


Oops. I think my stitch will still be strong enough though. Here are the stitches from the other side.


The reed will be laid in like this.


When I fold the bias over and stitch it down it should look like this.


The binding needs to cover every edge around the stays. I'm going to time how long it takes to do this. The first leg, starting at the bottom cornet of the center back and going just around the top corner, took about an hour and a half. Let's hope I pick up speed. 

September 21, 2009

reed in


The reeds are in. 


The bowed shape magically happened when the horizontal boning was inserted. Here is a view of the neckline from another angle.


The center front is almost 4 inches out from the seam at the underarm. That really helps make that nice conical shape. Here's a shot from above.


The channels along the seams with the blue bias binding have one reed in them, as do the horizontal ones across the bust. With both mock-ups I had difficulty getting the horizontal boning in as the fabric tightened with the curve, and decided I wasn't going to fight it with the finished piece. The channels at the center back also have one reed each. I didn't calculate the space the seam allowance would take up and I kept breaking them there. Eventually, I gave up trying to force two in. I'll have to try the stays on and lace them up to see if they'll be strong enough. If they warp too much, or snap, I'll have to use something else for boning. All other channels have two reeds per channel. They were all straightened, except for the ones running horizontally across the bust, those were left curved. 

Time to start binding the edges. 

September 18, 2009

seams finished and more grommets


The seams have all been covered and the basting removed.


Before the reeds go back in I realized the grommets for the shoulder straps needed to be inserted. After looking at the grommet setter I thought I had figured out why the grommets where coming out all torn up. The base was ratty, so I purchased a new grommet setting kit. The base on the left is the old one, on the right is the new.


And here are the grommets set with the new equipment.


Still ragged! Filing the edges won't take that long, but it's disheartening. And I still have the last couple to put on the straps. I have to find a better grommet solution before the next corset.

September 16, 2009

edith head - how to dress for success


Having been laid low by a bad cold I just got back to working on the 1780 stays today. Yikes. So until I have some progress pictures I thought I'd post some advice from someone who would know foundation garments, Edith Head.

"If you think the very same undergarments will suffice for all the items in your wardrobe you're mistaken." So true, Edith. Equally as true, "Aside form the importance of your underthings in shaping your outer silhouette, there is the psychological factor of feeling lovely from the skin out." I'm sure I'd feel lovely in something like this.


These pearls of wisdom, and the drawing, are from her book, How to Dress for Success, published in 1967 by Random House. I found this book in a hip used book store near my house. Imagine my surprise when I opened the front cover and saw this.


Sold. 

Actually, the book had me when I saw the cute illustrations and realized it wasn't John T. Molloy's, Women's Dress for Success. The 1970's book that I feel was responsible for ruining many women's sense of style. Edith Head's signature was just icing on the cake.

Alright, now that I've got that out of my system, back to the sewing machine.

September 11, 2009

continuing with seam reinforcement


Back to work on the stays. Once the thin binding strips were basted straddling the seam lines I sewed right up against the edge of the trim.


Then the demin seam allowance was trimmed.


Here's a close up of the finished seam from the inside.


And from the outside.


Now back to inserting the reeds. Again.

September 10, 2009

frog closures and the dress to go with them


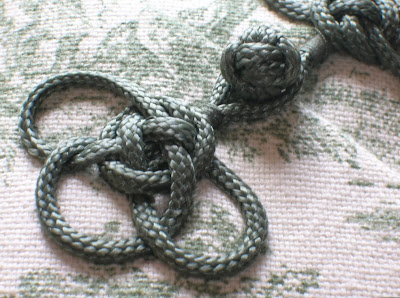
If I could have found frogs in the right shade of green, that were the right size, and not too shiny, I would have bought them. Instead it took days of fiddling around before I figured out a way to knot them and get them all the same size. I took a billion pictures for reference, if anyone is interested in a tutorial let me know and I'll happily put one together.


Here is the 1955 cheongsam pattern I used for the dress to put the frogs on.


And here is the result.


This is the first real dress I've made myself. Not a costume, more than a tent with sash, and no safety pins or double sticky tape holding things together. I did not let the zipper get the best of me. I did a Hong Kong finish on all the seam allowances, and sewed the hem by hand so it's invisible (The sleeves are finished the same way.). Also, sticking to my rule, I used fabric from the stash and a pattern I already had. No wonder I look so pleased.

The pattern required plenty of alterations to get this fit. It had 4 inches of ease at the waist!? I was reading Gertie's New Blog for Better Sewing and she had the same problem with a reissued pattern, but originals too must have had a lot of extra ease added. Not only did I take those 4 inches off the waist, I took a couple off across the back, and I added a few to the hips. I imagine without those changes the fit wouldn't come close to the illustration on the pattern envelope. 

I'm inspired to make a 1950's brassiere and cincher to help create a more 1950's silhouette. Wait, isn't that how this whole thing started?

September 8, 2009

seam reinforcement


I hate having to undo work. But I realized that I need to reinforce the plain seams so they don't rip out under stress, and I that it should be done before the reeds go in. So I pulled out the reeds near the seams, pressed the seam allowances open, made thin bias tape, and am basting it along the seams.


Once it's all basted on I'll sew down each side and the tape will help take the stress of the seam. I love how when making corsets, and stays, things that at first appear decorative are really structural. Like thin ribbon along seams.

September 4, 2009

reed prep


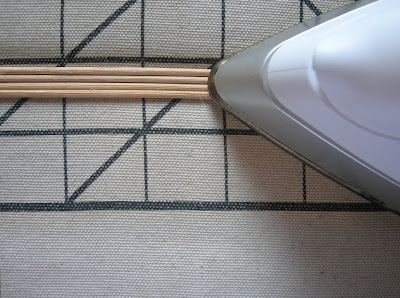
Before the reeds are inserted they are straightened by steaming with an iron.


Then the ends are sanded to remove sharp edges.


Here is a before and after shot.


Does that image remind anyone else of Constructivist art? The Museum of Modern Art has a great online exhibit, The Russian Avant-Garde Book 1910-1934, that has some cool Constructivist graphic design. I'm no Rodchenko, but maybe you can see what I'm talking about.

September 3, 2009

reed breaking solved


Steam! That the trick! Steaming the stays relaxes the fabric just enough so the reeds slide in easier. It's still snug, but I can slide them all the way to the last 1/4 inch, then guide that last bit in by pushing with my trusty needle nose pliers.


I don't grab the end, just butt the pliers up against it and carefully push, applying pressure with my fingers to guide it in. The reeds are all measured and trimmed so there is just over 1/4 inch space at the edge to allow for binding.


I'm so happy. I'd hit that point that comes in every project where momentum is lost and it seems it will take forever to complete. The reed situation was not helping. I feel like I'm back on track though. Hooray.

September 1, 2009

mundane stay making tasks


The loose threads are all being tucked away while I avoid dealing with the reeds. I just threaded them through a needle and pulled them into the nearest channel so the thread goes in the same direction the reeds will go when inserted. I don't want to chance the reeds catching on the threads and pulling them, or jamming them in the channel where there are several knotted ends tucked.


Here's a bit from the interior.


Now back to the stupid reeds.