June 30, 2009
summer corset on clothesline
June 29, 2009
finishing the cane boning

The channels were so tight the bones had to be slimmed down so they could slide in. Why the cane slipped in when I did the tests but not on the real corset is beyond me. I cut a millimeter off each side of each bone with Henckels kitchen shears.

The finished pieces measure 6-7 mm across. The bottom reed is before trimming, the top after.

Still, it was slow going. Aside from being snug, the gessoed cane did not slide easily against the coutil casings. And there were a spots where the folded under seam allowance of the casing would catch under the cane and ride up over it. Brother. I bent two pieces of cane while pushing them in, fortunately I prepared extra pieces for just such a situation. I can not imagine how difficult it would have been if I had tried working with damp, soaked cane. No matter. The rounded cane fills out the fills out the casing nicely and is very light. Next steps, press, finish bottom edge, and lace it up.
June 27, 2009
flossing ideas

I want the Eiffel Tower inspired Xs to vary a bit, maybe be jazzier at the top of the corset than the bottom, and I have to get the right weight and length to the Xs. Catherine Hay, editor of Your Wardrobe Unlock'd, visited the Symington Collection archives and was able to snap some photos of a giant flossing sampler, a great reference. Those designs make my flossing scribbles look pretty boring, but I should probably stick to something simple. I've also sketched out a few ideas for embroidery on the cording. The triangles at the spot where the cording meets the bone casing look nice, but a light row of Xs in the lower space between cords might be more in keeping with the theme. Thoughts? Suggestions?
June 23, 2009
finishing the top edge with bias trim

The trickiest thing was tucking the corners in at the low center "V" point. I was struggling with folding the end in until I thought, "What would Robert Lang do?" I decided he would not try to stretch or jam the bias tape into any position, he would gracefully fold it in on itself until it was flat. So that's what I did. So that I may do it again I drew a diagram.

The views are all from the interior of the garment, so wrong side up.
June 22, 2009
cane prep

The first piece of cane on the left is straight from the roll. The second has been sanded, soaked in a bucket of water, then laid between two towels with pots and pans on top serving as weights to flatten it. The third has two light coats of Liquitex gesso, and the tip of last one has been clipped and sanded to round the end. The cane started like this,

and ended up like this.

June 19, 2009
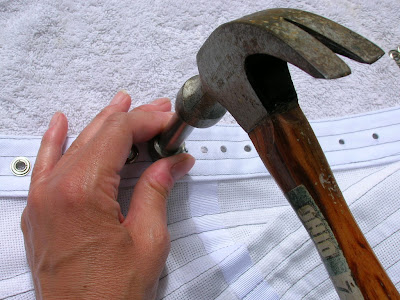
grommets in
June 16, 2009
stupid perfectionism
June 13, 2009
lacing strips
I've added along the center back below the waist to compensate for a hollow in the small of my back (This sounds more genteel than sway back, or the even yuckier sounding, lordosis.) so I started by tracing the center back pattern piece. I measured the width for boning and grommets, then added 1/2 inch seam allowance to each side (top of picture). I sewed the pieces together along the center back line and trimmed the seam allowance (middle), folded it over, and pressed (bottom).

After lining the sewn edge of the lacing strip-to-be along the center back I marked where the strip would be sewn to the mesh, flipped the fabric over so it was face-to-face, and pinned it in place along the seam line, measuring all the way to make sure it was exact.

The lacing strip was sewn to the corset, the seam allowance trimmed, and it was folded and pressed. I folded the raw edge in 3/8 inch and pressed. This will be on the interior of the corset and assures there is enough fabric to catch when the sewn from the exterior.

Everything was pressed in place, then from the front I stitched 1/16 away from seam, catching the folded edge on the inside of the corset.

I stitched 1/16 from the center back edge, then stitched channels for the boning.

Once those grommets are set I can lace up and do another try on!
June 12, 2009
spoon busk - stud side

Here's the graded seam allowance underneath the busk.

Draping the corset halves over the tailor's ham helped accommodate the curve of the busk when marking where the studs went.

The busk was inserted one stud at a time after each hole was made with an awl.

Then I grooved along the busk and folded the seam allowance under 1/8 from the groove.

The seam allowance on the back facing was tucked under, and after basting everything in place the busk panel was stitched 1/16 from the edge of the fold.

I stitched along the top and bottom edges of the busk to finish, and hooked both sides of the busk together.

Nice and clean. Hooray.
June 11, 2009
spoon busk - loop side
The busk needed to lay on top of the cording, so to make certain I had everything set up correctly I laid the pieces out the way they would be when finished.

Then I marked the spaces for the loops.

The pieces where sewn together.

The seam allowance was graded and pressed, then the busk was slid in place. I pinned it so it was snug, and made a groove along the edge of the busk.

I rolled the fabric out 1/8 inch from the groove, folded it under, and pressed it. Then I folded the raw edge of the busk facing under 1/4 inched and pressed it flat.

With the seam allowances tucked under, the busk was slipped back in and basted in place.

And finally, sewn.

I sewed around the top and bottom curves with white thread to finish it off. Next up, the stud side.
June 8, 2009
sidetracked by another corset

I started working on this corset just before I began the Corsets and Crinolines project. I thought it would be nice to have a simple flesh toned underbust that would disappear beneath elegant dresses. All was going well until I saw the wrinkles at the waist and freaked out. I thought I might get rid of them by taking off the bone casings and re-sewing them, (I swear the wrinkles weren't there before they went on.) but was dispirited and put it off. Eventually I got tired of seeing it half done and decided to just finish the thing. And you know what? It's not terrible.

The wrinkling lessened once the corset was on the body. I ran out of bias binding and used a different color along the bottom edge, and wish I had used the paler tone along the top as well. The dyed lacing tape doesn't match the coutil, but I like that color variation too. The pattern for this corset is the started as the Laughing Moon 113 corset girdle. That was four pattern generations ago. It's a single layer of coutil boned with flat steels, except for the two curved channels near the front, those are spirals.

front view with harsh side lighting to make those wrinkles stand out

the best back view I could get using a mirror
The big lesson here is to just keep sewing. I learned more about what works and what doesn't by completing this corset than letting it lay around unfinished. I know there are a ton of unfinished projects out there, pick them up! Keep sewing! Finish!
June 6, 2009
June 2, 2009
kleibacker's class act

mini-dress detail, Paco Rabanne, late 1960's

ball gown detail, attributed to Jaques Doucet, 1904
Look at the attention paid to finishing on that sequined hem. Holy moly. And even though this next photo is blurry, you can just make out the single thread holding the draping in place along the arm.

evening dress detail, Yves Saint Laurent, 1990's
I entered the exhibit through the side gallery, so I did not see the single "No photos please" sign until I exited by the main entrance. Too late. But I did not use a flash, and I touched nothing. Except the 1960's Charles Kleibacker muslins that had sign inviting me to do so.


bodice muslin detail, Charles Kleibacker, 1960's
Do you see what I see? The seams are clipped at the side seam along the curve at the waist, but instead of just being cut perpendicular to the seam they are clipped at an angle. That means the cuts are on the bias so they won't unravel. Genius! And that attention to detail is on a muslin mock-up. The Keinbacker muslin corner was my favorite part of the whole exhibit, and I would make a trip back to the museum just to look at them again.
If you happen to find yourself in Columbus, Ohio, the exhibit runs through July 5th.
June 1, 2009
pin cushions

Like scissors, pin cushions seem to accumulate. One with the sewing supplies, one in the embroidery box, one next to the sewing machine. I'd like to make the smaller one pictured here into a wrist pin cushion. I was told that in ye olden days pin cushions were filled with human hair because it kept pins and needles sharp, and also kept them from rusting. I saved my hair from the last few haircuts so I can make one to see if it works. I'm confident it will.
Subscribe to:
Comments (Atom)


