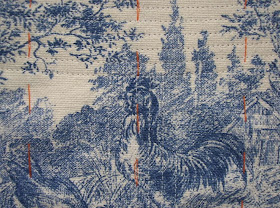
When this picture was taken at 6 AM it was only 77˚. When it hit 113˚ everyone was equally uncomfortable, corseted or not.
August 28, 2009
August 26, 2009
clothespin dolls
If my sister were a clothespin she would look just like this. And a bit of extra fun, her doll is wearing the first felting I've ever done. Here are my nieces.
Aw.
August 24, 2009
this is what it sounds like when doves cry
While mulling over the tucking in of the threads now or later, I thought I'd start inserting the reeds. I'm having trouble, they keep snapping. I'll get a reed almost all of the way in, then snap it with just over a half inch to go. It's getting very frustrating.
August 20, 2009
starting to look like stays
There are channels right against the seam lines on all the pieces. When I sewed those channels I sewed the side next to the seam just inside the 3/8 seam allowance line, then when I sewed the seams connecting the pieces I put the needle just outside that outer channel.
I guess I could have just sewn the pieces together and then sewn those channels, but I didn't. Now the question is do I insert boning then tuck the threads away, or do I tuck them away before I slide the reed in? Maybe it doesn't make a difference, but I'm sure it does. Anyone with more experience know if it's preferable to do one before the other?
August 18, 2009
a solution to ragged grommets
I love the guys Ace Hardware. They never just say, "files are in aisle 17B," they walk you to the exact spot and open the package to make sure the files will work to file the grommet (or whatever tool is needed for whatever purpose). I've also found that if you happen to be lost during a road trip you'll get better directions from someone at Ace than at a gas station. Anyway, here are the files.
And here is a grommet comparison. The one on the left has been filed and the one on the right has not.
While filing a half moon sliver of metal came off, which was very satisfying. To test smoothness I pushed a cotton swab through the hole to see if it's would catch. Nope. All smooth. Filing has saved this pair of stays. Before starting this corset documentation project, this is the exact sort of problem that would have landed this corset in the bin of unfinished projects. Thanks for all the suggestions, they spurred me to action.
August 17, 2009
spiral lacing and the worst grommet setting ever
Don't look too closely at my grommets, these are the worst setting job I've ever done. I set them the same way I always have so I'm not sure what my problem was, but the inside is really ragged on a lot (OK most) of them. Brother. But once a grommet is in it doesn't come out. There's no looking back with grommets.
August 14, 2009
shoulder strap overkill?
I pinned the Toile strap to the Toile body only, making sure not to catch any denim.
After sewing the Toile pieces together I sewed the denim strap, but I set it 1/8 inch from the body piece so the seam allowances wouldn't fall at the same spot.
I pressed the Toile allowance up, the denim allowance down, then graded the seam allowances.
Then from the front I stitched in the ditch right along the seam line.
The straps have just the one seam across the front,
and if I've assembled them the way I think I have there should be a line of stitching 1/8 from the seam on the other side securing the straps to each other.
Yep.
August 13, 2009
channels sewn
It may have gone quicker if I had used disappearing ink, or chalk, to mark all the channels instead of my pins and tape system. Maybe next time? I'll have to do tests.
The next steps are, knot all the loose ends, attach the shoulder straps, put in the grommets, sew the panels together, measure and slide the reeds in, then bind the edges. Whew, I'm out of breath. My goal is to be sewing binding by the end of next week.
August 11, 2009
breakthrough during back panels
OK. Continuing with the back panels. I laid the panels face-to-face, sewed them together at the center back, pressed the seam flat, then turned the panels right side out and stitched right near the edge of the center back seam.
I was a bit nervous about the channels because they are so long, and the panel so narrow, I had no wiggle room. But I took a breath, decided that after the threading breakthrough I was capable, and they came out OK.
I can't wait to see this corset from the inside when it's done.
August 7, 2009
securing the ends of the thread
Once both threads were together on the back I knotted them.
When the boning is in I'll pull all the loose ends into a nearby channel so they disappear. Look at how neat the front looks now.
Again, extra work, but worth it.
August 6, 2009
boning and more channels
I measured and cut the reeds for the small in between channels and sanded the ends.
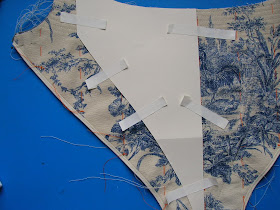
After they were slipped in place I could work on the long diagonal channels. Because they have a slight curve to them I made another template and taped it in place.
I couldn't slide boning into these channels when after they were sewn because the ends of the channels are against other seams. So I sewed that first seam, placed two trimmed reeds between the layers next to the seam, held them snug in place, and using a piping foot sewed right up against them.
The most difficult channels are finished. Once I sew the channels on the other pieces I can start assembling!
August 4, 2009
channel templates
After the Toile and denim front pieces were basted together it was time to start sewing channels.
First, I figured out the boning placement.
Then I made a template from the bottom of the horizontal stitching by tracing the patten onto a new piece of paper and running a tracing wheel across the line.
I cut the template out, taped it on the fabric, and started sewing.
Once I had that first line I could sew the rest using the presser foot as a guide.
Then I marked the center line with tape and sewed the vertical channels. I got the placement for the next couple of channels by placing the pattern on the fabric, pushing a pin through the starting point,
lifting the pattern a bit and marking that spot with another pin. I did the same for the end point, then I marked the sewing line with tape.
I sewed down that line, then once down each side, and a few more channels were done. I have to insert boning into these channels before moving on to the next ones so I guess I'd better rustle up some boning.